- See also: Tutorial
This page is a how to play guide for Starblast. Feel free to edit this guide with any tips, tricks, and suggestions.
Basic gameplay[ | ]
The basics of Starblast are to mine asteroids and shoot other players. The objective varies by game mode: destroy enemy bases, kill everyone else during survival, be first to reach kill target, capture more flags per round, etc. In team mode, the screen may glitch and show "you win" or "game over" when the opposite happened. For more tips, look below.
Controls[ | ]
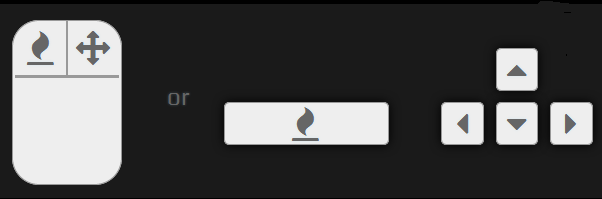
The controls in Starblast are fairly simple. The ship can either be controlled with the mouse or keyboard. Moving your mouse around along with pressing right-click or using the arrow keys will cause your ship to move while pressing left click on your mouse or the space bar on your keyboard will cause your ship to fire its weapons.
Starblast.io can also be played on mobile, if you’re a Google Play Store user or iTunes user, the controls are: the chat pops up when you hit the center of your ship, the secondary shop is a mine with a "$" in it, the RCS button is on the left side of your screen, the thruster and fire button is on the same side, the joystick (how you move) is where your finger is.
Upgrade Hotkeys (Upgrades)[ | ]
| Key | Upgrade | Key | Upgrade |
|---|---|---|---|
| 1 | Shield Capacity (increases the amount of shields you can have) | 6 | Weapon Speed (Increases how fast the lasers are, on the Barracuda it increases the "sustained dash speed" |
| 2 | Shield Regeneration (Increases how quickly your shields regenerate) | 7 | Ship Speed (Increases how fast your ship is) |
| 3 | Energy Capacity (Increases how much energy your ship has to fire lasers) | 8 | Ship Agility (Increases the rotation and the ship acceleration) |
| 4 | Energy Regeneration (Increases the rate your energy rechareges) | 9 | Upgrade Ship (Option 1) |
| 5 | Weapon Damage (increases how much damage your lasers do, on the Barracuda it increases the initial dash speed) | 0 | Upgrade Ship (Option 2) |
Tip: if you get the damage upgrade it's recommended to get energy regeneration and capacity.
Other Gameplay Hotkeys[ | ]
| Key | Control |
|---|---|
| Z | Take a screenshot |
| Ctrl/Cmd | Toggle RCS |
| Tab | Show/hide/switch Leaderboard |
| R | Show/hide Radar |
| C | Show/hide Chat Commands |
| F11 | Toggle fullscreen Note: no longer works with Esc menu being added to the website |
| U | Open/close upgrade bar (when max crystals) |
| Scroll wheel | Toggle secondary weapons and changes the selected secondary to use |
| W | Pull Up the Secondary Weapon shop (only in Survival) |
| Alt | Firing the secondary weapon |
| Shift | also changes what secondary is selected to use |
| Esc | Opens up a menu on the side of the screen shows the ship tree, you can get the game link there too, in the steam version you can also quit the app and the game you're in. It also shows current credit count, kills, deaths and in team mode the amount of gems you contributed. |
| V | Hold to give gems to teammates in Team Mode (Picking these gems up will not give you score) |
| A | Allows you to strafe to the left. (This is a mechanic that can be found when creating custom games.) |
| D | Allows you to strafe to the right. (This is a mechanic that can be found when creating custom games.) |
Communication Hotkeys[ | ]
In addition to the basic movement/attack controls and gameplay controls, many other keys on the keyboard (e.g. the "K" and "M" keys) act as an in-game selection addition to chat with other players in real-time. Here is a list of those shortcuts (in Survival Mode).
| Key | Message | Key | Message | Key | Message | Key | Message |
|---|---|---|---|---|---|---|---|
| O | Hello | X | Thanks | T | Team | H | Help |
| B | Bye | S | Sorry | F | Follow me | L | Leader |
| Y | Yes | P | No Problem | M | Mine | K | Kill |
| N | No | G | Good Game | A | Attack | Q | Hmm? |
List of shortcuts (in Team Mode):
| Key | Message | Key | Message | Key | Message | Key | Message |
|---|---|---|---|---|---|---|---|
| O | You | M | Mine | T | Wait | G | Good Game |
| E | Me | F | Follow | K | Kill | P | No Problem |
| Y | Yes | A | Attack | B | Base | X | Thanks |
| N | No | D | Defend | Q | Hmm? | S | Sorry |
List of shortcuts (in invasion):
| Key | Message | Key | Message | Key | Message | Key | Message |
|---|---|---|---|---|---|---|---|
| L | Hello | B | Bye | Y | Yes | N | No |
| X | Thanks | S | Sorry | P | No Problem | G | Good Game |
| O | You | E | Me | M | Mine | A | Attack |
| H | Help | F | Follow | K | Kill | Q | Hmm? |
These are different in some of the modding space mods since there creators added custom chat options in.
Various Tips, tricks, and strategies[ | ]
Upgrading[ | ]
- Upgrading a ship will cut into your crystal reserve but will help you mine and survive attacks better.
- At tier 4 known as the X-Warrior, upgrade your Energy Regen twice, it is all that is needed unless you max it and then upgrade your damage output twice also. You can shoot nearly forever if not forever while also doing slightly more damage. Works with the Mercury as well
- For U-Sniper and Vanguard, you can use a strategy known as “squidding.”( Using it's recoil to propel itself). If you don’t upgrade damage but upgrade capacity and regen, you can turn RCS off and shoot behind you to go extremely fast. Note: due to the recoil nerf on the Vanguard this said trick is not as effective.
- A maxed out ship will ALWAYS be stronger than a non-upgraded ship of the next tier. For example, a fully upgraded Side-Fighter will always be stronger than an un-upgraded X-Warrior.
Tier jumping[ | ]
- To jump tiers as fast as possible, upgrade the Energy Regen all the way as soon as you can(With the exception of tier 1 and 2 when you shouldn't buy upgrades at all). This maximizes your DPS, and although you spent some crystals, you'll earn them back 10-30% faster. Skip the other upgrades, with the exception of damage when your ship can regenerate its energy faster than you can consume it.
- If you have enough crystals to level up, but you don't want to move to the next tier, you can buy another life or just keep the crystals as extra shields. Note that the extra life won't help you when survival mode starts in survival mode. If your not going to the next level, fully upgrade your current ship.
- If you join at the very start of a team mode game, go for only the smallest asteroids. This is because gem drop starts out very low in team mode before gradually increasing and all asteroids must drop at least 1 gem(Mining the big asteroids takes a long time and will only give you a few gems).
- When you are a lower tier, focus on smaller asteroids, as bigger ones take too much time and you will likely get killed before you destroy it, however, you can still mine them if you want because it doesn't hold you back anymore than if you didn't mine them as smaller tiers. examples:
Fly: tiny and small
Tier 2: tiny, small, medium
Tier 3: tiny, small, medium, large
Tier 4 and up: every rock size
Attacking[ | ]
- If you attack someone mining an asteroid, crash into them from behind, so that they crash into the asteroid and do some extra damage from both you and the asteroid. Make sure you have enough shield to handle both the crash and weapons of the ship you're fighting.
- When attacking a ship that is faster, but weaker than you, and he tries to escape, try to do enough damage so it loses some gems for you to collect. If you ram them into asteroids, you will get even more gems, and maybe even kill them.
- If you attack and kill your killer, you get extra revenge points. In some modes this doesn't give you any extra points.
- If you are a lower tier ship, use your speed as an advantage. Attack for a few seconds, then retreat, repeat. If your shield gets too low, do not come back for a little bit. Works similarly with the faster ships like the A-Speedster and Shadow X-2.
- If you want to attack a group of players who have the same level ships as you, try to pick off stragglers that are in the process of mining. If your opponent retreats, do not go after him unless you know a proper escape.
- If someone is attacking and you are almost the same speed turn off RCS and turn around shoot, move, turn around shoot, move. Repeat the process until they die. This gives you a better chance of winning. (Note: this works best with pulse ships)
Defending[ | ]
- If you are getting attacked by a ship that's faster than yours try doing zigzags; it will be much more difficult for your opponent to hit you.
- Crystals act as health after your shield is down!
- When your shield is down and you're losing gems, try to pick them back up.
- If a player tries to attack you, don't be afraid to fight back sometimes.
- If your ship is heavier than theirs, meaning it is less susceptible to flying back really far when rammed, try to ram theirs. This will throw their shots off and will do damage to them, and you. Ramming them into asteroids (or a base corner in team mode) can really change who's winning a fight. (Heavy ship examples: O-Defender, Pioneer, Bat-Defender, Barracuda, or Crusader). If your getting attacked by a heavier ship, don't try to ram them back since it will negatively effect you.
- Run from tier 7 ships. If you have enough shields, you may attack depending on your selected ship. However, you can't kill them unless you have a very powerful ship and/or 3+ torpedoes.
Losing a fight[ | ]
- If you are getting attacked and don't think you can survive, press the upgrade keys quickly to avoid losing gems.
- If you have full crystals, and are about to lose all your shield buy another ship, fight back and upgrade to the next tier ship just before you start losing gems. This will max your shield instantly and gives you a better chance to survive.
DON’T RUN IN DEATHMATCH MODE (ever)
If you run in Deathmatch, your attacker is likely to catch up with you. This is why you should always stay and fight.
If there are tons of ships all fighting for a kill than maybe run. If you run, try to make it as unnoticed as possible. FOR EXAMPLE- Avoid bumping into asteroids and other ships, this will draw attention and make them want to follow you and eventually kill you.
Secondaries[ | ]
Secondaries are highly useful objects in starblast.io. There are 3 pods, 2 types of mines, and 3 projectile weapons.
Defense pods: These pods act like shields, protecting you from enemy shots. Defense pods don't work if you are being rammed. The enemy player can get within range of your shields. Defense pods are also useless against a Barracuda. Many players use defense pods, sometimes filling all their available slots with them. They can be handy, and if you are not skilled in fights, defense pods are ideal to help you. They also help when your fighting a group and allow you to take more damage.
Attack pods: These pods shoot at players but do not target asteroids. It takes more skill to fight with only attack pods and nothing else since they do not help mine or shield you. They can, however, be lethal if used properly.
Mining Pods: These pods help you mine, but their lasers do not damage players. These are ideal for beginners trying to reach a higher tier ship, since getting gems increases with having an abundance of mining pods. These pods are good for team mode games because you can upgrade your station faster.
To see more on the other weapons, click here: Secondaries
- If you want to get secondary weapons, then a good idea is to wait until you are a tier three+ so you have a bigger cargo. If you are a 3-tier, you could upgrade you ship to max and then start attacking other players that are close to your base.
Teams (survival mode)[ | ]
Teams can be found roaming the map all the time in Starblast.io. Some may be friendly pacifists like helping each other learn how to play the game, while others are aggressive "Frag Strategy" players.
A few tips for finding which team is right for you, and dealing with teams in a fight are listed below:
- Use the strategies listed below to see whether your team or team member (if you have one) will betray you.
- Be wary of level 3's. They may not seem like much, but coupled with some defense pods, and you have a major problem on your hands. Leaders such as these are going to kill you the second they have the chance. They will not team with anyone, so they don't feel like they are obligated to lose points.
- Level 6's will always win in a 1v1 fight, as long as they are experienced enough. It is best not to pick a fight with someone who's 2+ tier's higher than you, and it is also hard to befriend them. Teaming is a great strategy, as even accomplished players have stood dumbfounded when their maxed Scorpion was destroyed by a pulse fighter team.
- Another good thing to know is that those who only say "TEAM, TEAM, TEAM, TEAM..." are not likely to even start a team. When asking for somebody to join your team, or vice versa, always use the phrase "Team,?." This is expressed as T, Q, on the keyboard, and appears more friendly. It gives the other person the feeling of free choice.
- And also If you’re intending to win Survival Mode, try not to be the leader. Often times groups of players will “Team” up to try to kill you.
- If a team is chasing you with various types of ships and you're faster than the strongest of them and have more mass than the lower tier and faster ships in the team, run. This will get the weaker teammates far away from the stronger teammates and give the opportunity to use your mass and firepower to knock and kill the lower tiers and give you a better chance of surviving.
- Teaming is frowned upon because of low-level teams killing everything that moves, or teams of higher level ships that does the same.
- There is also a mechanic in survival mode known as bouncing lasers that can help kill teams by your laser bouncing from one ship to another until they are too far away or one dies (best with pulse ships)
Endgame Survival (Survival mode)[ | ]
If it just so happens that you make it all the way to the end of survival mode without quitting, congratulations. Almost. At the very end of the match, when a certain time limit is up or a player levels up to Tier 7, the game goes into a mode in which death is permanent, and players are all forced together.
Especially if you are an inexperienced player, or a low-level ship, fighting a Tier 7 or other high-level ships can be extremely difficult. Since Tier 7 ships have the highest bullet damages and DPS in the game, it is quite difficult not to get insta-killed by one. With this said, it is actually quite possible (and possibly very easy) to beat a Tier 7 as a lower level ship.
A good strategy to beat Tier 7's or other big ships is to use RCS-off and try to evade their fire, whilst still aiming and shooting at them. This can be a bit difficult for newer players, but it is quite easy once you get the hang of it.
Of course, making a team of players is a good way to get rid of any common threat. So, make a team of players, and go destroy that poor Tier 7.
Finally, there is a strategy that might be a little "mean". This is a strategy some people call the Mine Pile. As the name suggests, it involves a pile of mines. This strategy is executed by getting many crystals and buying 3-6 stacks of small mines. Once you obtain these mines, you find a good spot in the middle of the closing area and place them all in the same spot. Then you lure the unsuspecting player right into them, and deals a massive amount of damage, most likely killing them. Although this is effective, it may be considered poor sportsmanship, and the other player is likely to be a bit upset.
In team mode the same basic
Ships[ | ]
Tier 1 -- 5 gems to upgrade, 20 to go up to Tier 2.[ | ]
- Fly: The starting ship, most basic of them all. Recommended to not upgrade anything and just fill the gem capacity. Also considered annoying by some, because the speed and agility are used to troll. It's relatively small compared to the rest of the ships, which generally gets larger as the tiers raise. Moves to either the Delta-Fighter or the Trident when gem capacity is maxed out. It might also be used as a tag-team to take down much higher Tiers, but other than that there isn't much to talk about this one, so...
Tier 2 -- 10 gems to upgrade, 80 to go up to Tier 3.[ | ]
- Delta-Fighter: Widely used and a pretty decent Tier 2. Shoots three weak pulses a time, but if each pulse hits it packs a punch. Would not suggest using this to fight and rather to mine asteroids instead. Same goes for the Trident. Once gem capacity is maxed, you can either choose the Pulse Fighter, a formidable Tier 3 ship which is good for fighting and mining. Or you can choose the Side-Fighter, which is stellar for mining and okay for combat.
- Trident: Same mining and combat ability as the Delta-Fighter. Nothing special about it... the Tier 2s don't have a lot of variety compared to the higher tiers. Once gem capacity is maxed, you can either pick the Y-Defender or the Shadow X-1. Although, I would rather pick the Y-Defender because it's fighting and mining ability is leaps and bounds over the Shadow X-1.
Tier 3 -- 15 gems to upgrade, 180 to go up to Tier 4.[ | ]
- Side-Fighter: Very good mining ability, if you are looking to move up to Tier 4 fast then I fully recommend this. Also can hold it's own against the other Tier 3s, except for the Y-Defender. Destroys the Tier 2 ships with ease, and does okay against non-maxed Tier 4 ships. Half the time I use Pulse-Fighter and the other half I use Side-Fighter.
- Pulse-Fighter: Combat ability is balanced with its mining ability. Love using this because it's a good option for staying alive and destroying your foes. Does very well against Tier 2s, Tier 3s, and some Tier 4s. Its speed is useful for chasing and running away while dealing moderate damage at the same time.
- Shadow X-1: I tend to avoid this... agility and shield are low, as well as damage when comparing it to the Y-Defender or Pulse-Fighter. In most situations, this should not be the choice of ship. Not much else to say about this other than it has the fastest ship in the game. The Y-Defender or Pulse-Fighter would be a better option if you're going for the Pioneer as a Tier 4.
- Y-Defender: Extremely formidable and dangerous Tier 3 ship. Even with the nerfs in recent updates, it still kicks ass in a fight! I've taken down multiple Tier 3s single-handedly. Plus, taking down T4s with the Y-Defender is a walk in the park. Mining with this is okay, not the best, but still good and able to clear asteroids fairly well. Be wary if you come across this as a Tier 4 and below.
Tier 4 -- 20 gems to upgrade, 320 to go up to Tier 5[ | ]
- Vanguard: The newest ship to be added. The ship does insane damage for it’s level. It does however have the least amount of health for its level. It can take down level 3s with ease. It can also pose a threat to un-upgraded level 5s.
- X-Warrior: Mining with this is a dream. Large or small asteroids, it's good for mining. Okay in combat, though, the Side-Interceptor and Pioneer is obviously better in that area. If you look to quickly get the T-Warrior or Aetos and aren't paranoid about enemies, this is the ship you go to!
- Side-Interceptor: Personally I feel like the gap on the Side-Interceptor should be closer in, nevertheless it's a balanced ship for both combat and mining.The side-interceptor has a good upgrade (X2) and one alright upgrade (Aetos). You would only want to go side-interceptor if you're looking for high agility and speed tier sixes in the A-Speedster and Condor or are looking to mine up to tier seven with the rock tower.
- Pioneer: Just about the only formidable Tier 4 in combat. Avoid fighting if you are not near maxed with it, though. Mining is decent enough to get you through to Tier 5 at a steady pace. Then again, I would only use it if A-Speedster, Condor, or Rock-Tower is your preferable type as a Tier 6.
- Crusader: A monstrous amount of shield for a Tier 4. Great mining with this one, I like bashing into rocks with it for faster results. Other than that it's a pretty well-balanced ship and can do well against its own tier, and tiers below it, excluding the Y-Defender. And if you do have the Crusader, you're probably headed for the O-Defender.
- Mercury: So I just tested this ship out as of 2/17/2017. Seems pretty decent to me, able to hold its own against the Y-Defender and Tier 4s. Had it maxed, glad we finally have a Tier 4 that's able to destroy the Tier 3s with relative ease. Although, it is still lacking against multiple opponents. Wouldn't mind if the developers gave it a little 20-40 shield buff in the future.
Tier 5 -- 25 gems to upgrade, 500 to go up to Tier 6[ | ]
- U-Sniper: It's bad and good for combat at the same time, it really depends on what you're doing. If it's a smaller ship you are aiming at, you will only hit with one pulse because of the gap between them. Other than that, it's an excellent fighter, I would say. For mining, though... it really sucks, big time. The recoil makes it irritating because it pushes you back a lot. You really should only use this for maps with plentiful and large asteroids. I must say, though, the reward for getting the Advanced-Fighter pays off pretty well.
- T-Warrior: This is a decent ship, shooting five spread-out shots from its front. It crushes Tiers 1-5 fairly easily, due to its energy regen combined with the shield capacity. It resembles the Delta-Fighter because of its multiple shots, and will definitely make someone pay for getting in close. Not to mention the mining is also very good with both small and large asteroids. Upgrades into Condor and H-mercury
- Aetos: The 2/13/2017 update made it better, but not by much. It's still heavily lacking compared to the other Tier 5 ships. Mining is mediocre with it, and its upgraded options are sub par with the A-speedster and Condor.
- Shadow X-2: The X-2 fires two close pulses from its front that do moderate damage. The X-2 has very low agility but high speed and decent firepower, but is horrible at mining due to its low mass and mediocre firepower. It upgrades to the Rock-tower and A-Speedster, but I would recommend the FuryStar unless you plan to stay at the X-2 to fight others.
- FuryStar: The Furystar fires two very concentrated pulses from its front canon. It is decent at mining and combat, and is the best option to mine up to Scorpion. It will hold its own in combat, but still be careful, as a maxed tier five should still be able to beat it. It also upgrades into the Marauder.
- Toscain: I'd say the Toscain is one of the least mentioned ships in the game, and it's a forgettable tier five. It still has its uses though, and can mine well, but is not very good in combat. It upgrades to the Barracuda and Rock-Tower, which are both decent tier sixes. I would not suggest trying to kill other ships with the Toscain, even maxed. Note this ship has been removed from the game, was replaced with Howler.
- Howler: One of the best ships of it's level, in it's base form it's not the greatest thing (but most ships stink in there base form) but it can mine fairly fast, especially with full mining pods. When maxed it can easily attack ships on it's own level and even stand up to the t6 ships in the right conditions. When loaded up with attack pods it has a very high dps, even with being able to take on t5s and t6 fairly well, however it's not the best at fighting t7s.
- Bat Defender: Sturdy ship with plenty of shield capacity to smash into asteroids for much faster mining. Would recommend using it on maps with medium-large asteroids because of its slow speed. Now for fighting, I've chased off some Tier 5s so I wouldn't say it's too shabby. It's a very good miner because of its high shields and moderate firepower. Definitely, crushes Tier 4 ships beneath its feet. Nice, well balanced, but maybe a little too good for being able to access the O-Defender.
Tier 6 -- 30 gems to upgrade, 720 to go up to Tier 7[ | ]
- Advanced Fighter: Boy, do I love using this one. The power! Being able to fling everyone across the map is just too satisfying. Although I don't use it that often because the mining with the U-Sniper is horrendous and I hate it. Mining is similar to most Tier 6 ships, just ram your way into asteroids use your front pulse only. Anyway the U-sniper in the right hands can kill you even if your maxed.
- Scorpion: I use this one a lot, mainly because it's powerful and easy to get to using the route I take along the left side. Pretty much the second most powerful Tier 6 in the game, falling just behind the Advanced Fighter. Able to annihilate almost anyone who crosses its path, they run in fear at the sight of it. Mining is also likewise other Tier 6s.
- H-mercury: The worst level 6 in the game. It can mine fast which will make maxing somewhat easy, it also performs when you have a full load of attack pods. It can take down ships quickly like that. Note ship has been removed from the game and replaced with Marauder.
- Marauder: The ship's stats are between the Condor and A-speedster. It mines somewhat slow in it's base form, but most Tier 6 ships do, this ship rips other ships apart when it's maxed especially with full attack pods. Like most high speed level 6's, it doesn't do that well against a good Scorpion or Advanced-Fighter
- A-Speedster: My old friend, the first Tier 6 ship I had gotten. Its combative ability isn't as powerful as the Scorpion, Advanced Fighter, and the O-Defender. You have to admit the thing is agile and packs a punch for such a little guy being no larger than a Y-Defender. It has the speed of a Condor while packing a punch of power between the ability of an O-Defender and a Scorpion. Very, very versatile. Mining with it is odd because it doesn't have the ability to really ram into the asteroids like the other Tier 6s do. It still is a very good ship if used correctly and maxed.
- Condor: Maybe I'm being a little rough with this one, but still, I find it more situational than practical. It only has the power of an O-Defender but smaller with less health and faster. Being able to chase down smaller ships seems like a specialty of it, though. Personally, I would be more scared of a Condor than a Scorpion if I was Tier 1-4. Once again, mining is likewise most Tier 6s.
- Rock-Tower: One of the best ships, mainly because of its firing manner. It has pretty big energy capacity, really big shields and regen, and stable firepower. Its firepower is weak compare to other tier 6th but last really long, so if you find another ties 6, Rock-Rower will just smash it. It is very good for mining up to tier seven.
- Barracuda: Really good ship, mainly because of its dash. If you're on map with A LOT of asteroids you can travel along the map and find "miners" that only mine and have a lot of gems, and then you dash in them and crash them in the asteroids. But this ship has its weakness - no firepower, that means that you can kill someone only with your shields, which means that you are pretty much useless until your shields regenerate if you are low.
- O-Defender: Well now for the last one, and I have to say the O-Defender is an absolutely lethal ship. Easily one of the top 3 in the game. The combination of bursts with medium damage pulses with a literal colossal amount of shield capacity, not to mention the insane shield regen it has... makes it hard to kill for any ship. The only ones I know of that can put up a decent fight against an O-Defender is the Advanced Fighter, the Scorpion, and the A-Speedster. Mining is extremely easy as you can run over hordes of large asteroids without taking much damage at all.
Tier 7 -- currently the maxed level[ | ]
- Odyssey: Will one shot most of everything. Has massive amounts of shield capacity. Tier 7s are supposed to be very overpowered compared to the rest so I think it needs a little speed buff in my opinion! Cannot shoot flies with the giant laser though.
- Shadow X-3: Well this is the one I use most of the time now. Mainly because its speed can chase people down in survival mode, as well as one-shotting most ships with ease. Moderate shield, but fast and strong. Definitely my favorite, though it has a risk of being killed by heavier tier sixes like the Advanced fighter.
- Aries: It's nearly the same as Odyssey, but it has less powerful bullets and faster recharge. Also it has more shields (+50) and it is slower. Because of it's bullet strength (that is smaller than Odyssey's) Odyssey generally wins.
- Bastion: It's the best ship to fight with players (but not Odyssey and Aries) because it has VERY large amount of energy that recharges quickly, but when its time to battle it kills nearly everything. It has also big recharge of shields, average speed, small mass (bad to Odyssey and Aries), and has the worst rotation in the game.
Better info on all of the ships found on there respective pages and the Ships page has the upgrade tree and all of the modded ships from Modding space
Tactics[ | ]
Planning ahead[ | ]
So in this section, I will only be focusing on basic strategies to advance in the game and get a competitive edge over other players. So what I usually do to get ahead of everyone else, in the beginning, is to look at u/-Loveship's server listing (thank you Loveship). Then I simply wait for a new server to pop up and join in as fast as I can. Please also keep in mind that your wait for a new server depends on the time of day in your location.
Minimap Awareness[ | ]
So the first thing you need to look out for is people on your radar. Make sure to frequently peek at your minimap so you know what's going on around you because if you don't then you'll end up dead very quickly. Keep track of the leader and all the dots around you. If you see someone on the radar heading to you directly, you can either assume these four things. (survival mode but you should still keep an eye out on your radar in team to watch for enemy teams)
- He is running away from someone (only if you see someone behind him, and if so, you better run too)
- He is simply passing by (very rarely)
- He is out to kill you (usually)
- He wants to team (rarely)
- He and his team are out to destroy your base (only if he is with 3 or more people)
- He and his team want to farm gems by killing others (only if he is with 3 or more people)
Based on what we know, you have to make an assumption to take preemptive action to eliminate any threat posed to you. (1) If they are simply running away from someone and the aggressor is stronger than you, just move aside so you don't die. (2) If they passing by, let them, but if they stop near you, assume they are either; (3) out to kill you or (4) wants to team. This situation is generally more dangerous than him running away from someone or simply passing by. Be wary of teams heading toward you as well, that's usually a very bad sign as it indicates a 5-6. Assume it is a (5) if you are near your base or if they are headed towards your base, and (6) if you are on your own. If it is a (5) you should try to quickly gather the closest people and prepare to defend. If it is a (6) you should run away and maybe gather teammates because it could quickly turn into a (5).
Ship Management[ | ]
Your first concern should and will be energy regen so that you are able to mine and fight better. Upgrading it significantly increases your survivability. Once you've fully upgraded your energy regen, you will want to invest one or maybe two points into damage because if you aren't using more energy than you're gaining, you're really wasting it. Just think of it like this.
- Energy constant regain rate at 10/Second. 50 energy capacity. Each pulse uses 2 energy 5 times per second. As you can see, the mathematical equation would look a little like; 50 - (10/Second - 10/Second)
- The energy capacity remains at 50 and you're only using your regen instead of capacity - regen. But now you upgrade your damage a little bit and here's what happens.
- Energy regen 10/Second. 50 energy capacity. Energy usage -15/Second. Math; 50 - (10/second - 15/second) now you use your 50 extra energy in 10 seconds. In other words, You're using 15/Second and then going back to 10/Second once your capacity reaches 0. Therefore it's more profitable.
I tried to explain that in the simplest way possible, hopefully, you guys know what I'm talking about here. Next up on our priority list is shield regen, so that you can bump into asteroids more often (faster mining) and recover from battles sooner. Then the next down the line would be shield capacity, obviously, so you can take more hits during a fight and destroy asteroids faster. After that would be speed, then energy capacity, then pulse speed, and lastly agility. Although I would try to avoid spending extra gems unless you're being bothered, or until you reach your preferable Tier 6 or Tier 5 ship on occasions.
Mining[ | ]
There isn't much to talk about since this is a very basic concept but I might as well lay it out there. If you have full shield capacity and you're sure no one around you is going to attack, might as well bump into the asteroids a little bit to mine faster than you would normally use just your pulses. If there are people around and you keep bumping into the asteroids, they will probably kill you a lot easier than if you hadn't. Just be careful when doing that, and cite to Tactics - Ship Management for farming efficiently using your energy regen. Also, you will want to go for faster ships on maps where there aren't very many asteroids or small asteroids in general.
My tactics for getting through tiers extremely fast is simple. Here's a little something that should help. Oh and by the way, always upgrade energy regen fully. (for survival mode mostly but parts can get used in team mode)
- Tier 1: Just get to Tier 2 as soon as you can.
- Tier 2: Invest in energy regen, then get to Tier 3. (or rush to t3)
- Tier 3: Same thing again, invest fully in energy regen and 1 point in damage (only with side-fighter and sometimes pulse-fighter)
- Tier 4: Same thing again, just upgrade your energy regen, but if you see that when you're firing, you still have full energy, upgrade damage to 1 or 2 points.
- Tier 5: Max energy regen, at least 1 point in damage. If it's already really powerful leader (so its nearly end of match) you can upgrade your ship completely. Can be a threat to level 7s (U-sniper and furystar in the right conditions )
- Tier 6: Fully upgrade everything (if you're leader, if not, just upgrade regen and mine as fast as you can and run from everyone so nobody kills you)
- Tier 7: Don't run kill everyone, but first mine at least 1/4 your's gem capacity, because if you will find a powerful team saying "KILL LEADER HELP TEAM" they will probably put down your shields and kill you, but if you will have some gems, you will kill someone with gems, take there gems, kill another one, than another, and win.
Teaming[ | ]
Whether or not your team is entirely up to your preference. In some cases, teaming will work out for both players, and in other cases, it may end up stabbing you in the back. Always be wary when you're teaming with someone or multiple people perhaps, but if you're leader, to have a good team, just find tier 3-4 and say "TEAM OR KILL" and that’s all. Teaming is also a highly controversial strategy. You might also find teams of 2 that are helping each other.
Battling & Surviving[ | ]
If you want to survive, try not to draw much attention at all. Going around killing a whole bunch of people before you reach a maxed Tier 6 will bring you many annoyances and prove to be fatal in the long run. Now, if you're in a battle and you are getting your ass beat, then spend all your gems, if you have any. That way you will have more upgrades to your ship, which will take less time to get to the next tier than if you hadn't done it. Losing a life and some points isn't really that big of a deal unless you are at 0 lives or have died repeatedly without making progress, but the most important thing is to "don't bite more than you can chew", so if you have 1 life you must consider, that if someone will kill you 1 time, you will have 0 lives and it's a big chance that you will die, so if you have 1 life, it's better to just mine and do not battle with anyone.
You may also want to do calculations in your head to determine if you can beat an enemy or not, this is crucial to your advancement. Consider everything that could and couldn't happen, such as checking to see what their shield is like, and what yours is as well. The number of gems both of you have, and the firepower comparison between both ships. It's also better if you can get the drop on them as well, for the advantage. Don't forget as well, when the shield reaches 0, the hull strength will be dependent on the gems.
Secondaries[ | ]
There are 3 pods, 2 mines and 3 projectiles.
The pods are Attack pods, Mining pods, and Defense Pods. They do what they say Attack pods attack, mining pods help you mine, defense pods protect you from bullets. Don't ever use defense pods, they don't always work. Mining pods only are effective in team mode. Attack pods are the most useful, they make bullet hoses much more powerful. All cost 120 gems (which converts to credits by going into the gem depot in team or hitting "w" in survival mode)
The mines only differ by size, health and damage. but full packs of each do similar damage, you can not drop them right in front of people due to a arming delay. The small mines cost 100 credits in packs of 8(2 second arming delay) and the heavy mines cost 200 credits in packs of 4 (4 second arming delay)
The projectiles are Rockets, Missiles, and Torpedoes., rockets are the fastest and cheapest but not that useful other than to perhaps to deal with flys and X1s. Missiles are highly useful, they are somewhat cheap, they move quickly and they deal good damage. Torpedoes are only good if they hit the intended target (a base or a level 7 ship) or a group of targets (a team of 3+ people). Torpedoes are the slowest and the most expensive. (Rockets, 100 credits in packs of 4) (Missiles, 250 credits in packs of 2) (Torpedoes, 500 credits in packs of 1)
You can only hold as many secondaries as your Tier up to Tier 6 (Tier 7s can only hold 6 secondaries) (Ex: Level 1 can only hold 1 secondary (packs count as one).
More details found here Secondaries
This is more centered for survival mode but mostly holds up in Team mode as well.
Strategies[ | ]
The All-Around Strategy (only use this strategy for tier 3 and above)[ | ]
This is a simple strategy, recommended for beginners. (And can all around be helpful) Whenever the upgrades are unlocked, upgrade all of your available stats. This way your ship will have the most minimal weakness in terms of its stats. One thing you have to keep in mind when using this strategy is that it will take longer to upgrade your ship since you upgrade your stats first. Of course, you can skip some upgrades like the Speed and Agility stats if you have the skill to outpace other players. If you are feeling uncertain, just upgrade your stats, and you have nothing to worry about. (Except for other enemies that are teaming with other ships) Unless you have the skill, you should probably use this strategy until you get better, then you can make your own favorite strategy!), below is some strategies by members of the starblast community
The Cloaking torpedo.[ | ]
Launch a torpedo at a base but make sure to stay on top of it. If someone decides to kill you, it doesn't matter because if you die, the torpedo is still there to wreak havoc on their base. If you don’t get killed wait until you get close to the station then abort to the side to not get killed. You can do a torpedo rain with this strategy too!
However, torpedoes are rarely useful in fights. Most ships will simply dodge, and there's 500 credits down the drain. The exception is if your fighting an Aires, an Odyssey, or possibly an O Defender. As they have poor agility you have a good chance of landing a hit with the torpedo and stunning them. However, there is a arming time of a few seconds so fire from a distance.
The "Frag" Strategy[ | ]
This strategy is one that will do one thing only, get you to the top of the leaderboard in no time at all. This is done well by seven ships: the Side Interceptor, Side Fighter, Pulse Fighter, Pioneer, advanced fighter, howler and barracuda (note: Y-Defender can be used but requires more skill, same for Furystar and Delta-fighter). The amount of damage these ships can pump out quickly makes them ideal for taking out ships. They are a range of high and low tiers, which means that you may not only be a higher tier to frag others With this technique, I have easily gotten over 50 frags using this strategy. (Note: Don't abuse this strategy, it can make the game not enjoyable. Also, to counter this, get a heavy hitter like the U-sniper, Advanced-Fighter, and Scorpion. (for smaller ships ideally of lower tier like 3 and 4) Try to hit them as these ships have low mass. As soon the get hit and start to spin, hit them while they are spinning and they will die.) vice versa for the ships of higher tier 5 and 6.
The "Incite the Noob" Strategy[ | ]
You buy a bunch of heavies early in the game, wander over to the area around an enemy base, and drop the heavy or space mines. Being noobs, there will be people who wander over and blow themselves up. Party time!
The "Death Spin" Strategy[ | ]
This is a strategy used in combat. You have to have a maxed-out Pulse Fighter. Once you encounter a higher tier enemy, you ram into them. after you get knocked back you spin behind them, dodging the large bullets and allowing you to hit them. You do this multiple times until the enemy is dead. This is also frowned upon because people hate the rampaging pulse fighter. Still possible with RCS being added in but very hard, you will be better off not using RCS.
Note: This strategy may no longer be effective because of RCS.
Teaming Tips & Tricks for Survival mode[ | ]
Teaming is an incredibly risky business. Teams are often known to turn on one another, for crystals, points, or other teammates. You must be careful when teaming with people unknown to be trustworthy or not because sometimes they might not be teaming with you, even if you think so. If your teammate just follows you, no matter what you do, be especially wary and or chase them away, because they might be waiting for you to ram a couple Asteroids or otherwise get your shield depleted, before attacking and killing you for your Gems. Watch your map and be especially wary of groups of ships. Sometimes, it is far better to play solo than with a team.
If you mean to team for security, or just be a trustworthy ally, shoot asteroids others are attempting to mine, this will show you are serious about teaming, and not killing them. It is not recommended to fly around the map as a team, killing everyone and dominating, as this is seen as jerk-like behavior and you may regret this later when a large team attacks your team, or you are targeted for being jerks.
Note from another person: I cannot confirm if this remains viable, but it was at some point it was common to have large groups of Y-Defenders swarming in groups and killing everything, regardless of rank. This included Flies. Please don't do this, unless you are desperate to get a large score. (and even then it will only give a very tiny amount of points if any) Killing flies are useless, and the most gems you get would be 20, so there is no point.
Note from a 3rd person: In regard to the above Y-Defender strategy, never do that. Ever. It is mean. Also, people may say "team" just to get you to drop your guard. I once had a team of Y-defenders attack me. However, that was a long time ago. I was trying to get the A-speedster, but I was never able to max it out.
Note from the administrator of this wiki: Teaming in Survival Mode is generally regarded as a noob tactic since you just gained another "unit" that protects you. If you team to mine or to kill someone (while outnumbering them/their team), many regard that as bad sportsmanship.
BE ALERT: sometimes you will get a person who wants to team with you, but sometimes those people who want to "team" with you can be sketchy, so if you feel unsafe then watch their behavior, a few sketchy things a "partner" could do are following you but not mining I find that very sketchy, especially if they are right on your tail, if they get right up on you move away because they might start shooting you and in since they are that close to you, you are vulnerable. so BE AWARE OF YOUR "TEAMMATES". Also, beware of groups on the radar flying towards you. They can kill you.
A good team suggested is a Howler, U-sniper, T-warrior and Furystar.
"Ammo" Strategy[ | ]
This strategy based mainly on mining. All you do for many ships, (the later ones you can if you want) is only upgrade the ammo regen speed. Also, maxing damage with regen speed is a good way to go. This way you can shoot as much and as fast as possible to take out more rocks and upgrade your ship.
Other: It is also a wise idea to upgrade energy capacity if you upgrade damage, allowing you to fire more shots before running out of energy. This is also needed with most of the pulse ships.
The Shadow Torpedo[ | ]
Another strategy, if you don't feel like teaming up, is to utilize the Shadow X-1, the ship with the highest top speed in the game. Get a maxed out Shadow X-1 and mine peacefully during the game (if any other ships try to kill you, you will easily outpace most of them).
Save up gems until you can buy a torpedo, and perhaps some missiles for survival mode. When you and ideally one other ship are the only ones left, (they will almost always have a much stronger ship than you), simply fire everything at them and win the game.
Try to avoid them as long as possible at the end of the game in the gravity fields (running between the fields when they've overlapped most of the map is a good strategy, then if the stronger ship follows you in, they will be unable to move sideways to dodge the torpedo).
Watch out for the Shadow X-2, it has a slower top speed but faster acceleration and is a threat. Also if you are left with a very large high-level ship, they will often take a lot of damage from slamming into asteroids when the gravity fields are at maximum saturation, so wait a while before firing the torpedo.
Some random dude who forgot to sign: This is not effective because of an arming delay on the torpedoes, the same for mines.
Another random dude who doesn't want to sign: The strategy is still viable, but try and inhibit their movement with some mines randomly place in the center to stop their mobility (note: may be seen as a douche move)
A Shadow x-1 user: I also use this strategy in team mode. It works pretty well, but players can dodge the torpedoes and missiles. Missiles are harder to dodge as they home in on targets.
a random dude who gets annoyed by shadow x-1 : you can use shadow x-1 against a group of pulse ships, slow ships and teamers becaues you can easily outmaneuver them and slow them (in upgrading). I see this is very good to make your enemy (in team mode) to not mine peacefully and give more time to your allies to mine and level up (upgrade the shadow x-1 to max speed and agility) well actually this is not included in the shadow torp strat but idk where to put them so i put this tip here :)
Guy who is allergic to signing : shadow x-2 is a bit better at this strategy since it can store 2 extra secondaries (total 5) and it still is the second or third fastest in the game (i cant remember if the fly is faster). The only way you will mess up is if somebody is using the same strategy but is using an x-1, or somebody is really good at using the fly. With the the shadow x-1, a shield pod would be helpful in case if you run into a ton of ships.
The RCS Dodge[ | ]
This strategy can be very useful if you are being attacked by someone using RCS on you. When the player shoots at you, turn to the left or right as quickly as possible, avoiding their shots. Shoot at your enemy afterward. If they come back, repeat the process. Eventually, you can kill your enemy or succeed in boring them out of attacking altogether, which is awesome! This strategy was created by Mr. Plutonium Ore.
The Trap Maneuver[ | ]
This strategy is highly effective against someone chasing you if done properly. You can use this in Survival Mode (if you have friends) or Team Mode. So, when someone chases you, run away. Then, have your friends come from all sides of the attacker. At this point, commence attacking the threat. When they are surrounded, they will easily be killed. This strategy requires good coordination with your team members, or it will fail, i.e., they get away or get killed along with your team. This is hard to do in survival mode because of bouncing lasers.
Anonymous I find that you don't necessarily need much coordination half the time your team is just going to shoot at anything they see so if your target is gullible enough to follow you then this will work very well
(and it's pretty funny watching some gullible barracuda get wrecked by tier 3 ships:D)
The Barracuda Destruction Method[ | ]
If there is a Barracuda hot on your trail, this strategy is very helpful. First, max an A-Speedster or Marauder, since they are the 2 fastest T6 ships. (Condor works just fine as well, it's just a bit slower than the A-Speedster or Marauder) Then, buy a couple of torpedoes( missiles will also do fine but you will have to buy more). When the barracuda is right behind you, turn off RCS, turn around, and fire a torpedo, or just all of them. The Barracuda will be instantly be annihilated, and you will get extra points and cargo. Not effective because of arming delay on the torpedoes and global cool down. (But one can kill a barracuda easily with RCS off and drifting away from the ship (just don't get in front of an asteroid or you're dead.)
The Ultimate Domination Strategy[ | ]
All you need here is a maxed-out Side-Fighter or Pulse-Fighter, 3 packs of missiles, and you are set. Be prepared to watch your score gradually increase. People especially hate this (take this from one of the victims of this) along with secondary spam being impossible outside of battle royal. But along as you didn't get deleted by missiles they are generally ended quickly by a player with a good aim in a heavy hitter due to both ships having low mass.
No Escape[ | ]
This strategy involves having one very powerful ship, such as an O-Defender or Advanced Fighter, and one Shadow X-1 (or Fly) (A-speedster can work well because it can survive longer than the fly and X1), which means that when the large ship attacks someone, the smaller, faster ship can follow and shoot them until they are destroyed. If the target attempts to slow down and kill the weaker ship, the powerful ship will catch up and destroy them. There is almost no escape for this tactic other than being in a team.
If this tactic is used against you and are alone, your only chance will be to disable RCS to drift away at maximum speed while turning around and shooting the faster ship, however, this may be difficult as you will likely have been weakened by the stronger ship. It is easier to counter in survival because of bouncing lasers.
The Fast Mining Strategy[ | ]
When you start out in a server (preferably a game where there isn't already tier 5s or more), go defender path(far right path). Mine to the next tier while barely upgrading to make mining a bit faster (energy regen, shield regen, and possibly ship speed since the ships on this path are quite slow). Do this till you get to O-defender where you should either max the o-defender or mine to tier 7. This is referred to as power mining which is also considered as a noob tactic.
In team mode, this is a great strategy (even if considered a noob tactic) You can upgrade your station far faster than other teams (obviously buy mining pods) Once you reach o defender, go on the attack! First max out upgrades. You will have enough creds to buy lots of pods and secondary weapons. If you have 2000 or more credits, buy torpedos, and destroy or damage an enemy base! If you plan to fight a lot, I recommend defense pods as well as attack pods. Enemies will have to get though your 550 shields, and 13 shields/sec regen plus the pods to even disable you! This is quite similar to the "Barracuda and healer strategy
The Tier 7 Killer[ | ]
If you are in a team match, and an opposing team has got T7 ships, all you need to do is buy 3-4 torpedoes. If you can, recruit your teammates to do the same. 3 torpedoes can kill a bastion or an x-3 with a full cargo, and 4 torpedoes are needed to kill an Odyssey or an Aries with a full cargo. Anyways, when you have found your T7 target, press shift-alt repeatedly in their direction, then get out of their way. The torpedoes will blow them apart, and you can salvage their gems to upgrade your station. You just have to be careful or you wasted 2000 gems because there is an arming delay on the torpedoes. This is extremely common in the ACW events in a slightly different form, torpedo rain(s).
Note: this strategy is less viable due to arming delay and global cooldown.
The Multi-Laser Strategy[ | ]
All you need is a ship with a high rate of fire, such as the Maraurder, Side-Interceptor, FuryStar or Aetos, and load your secondaries slot with attack pods. Then max out your ship. When you attack, your enemies will be overwhelmed by your lasers and will almost instantly be killed. Note the H-mercury was replaced but the strategy still holds true.
ANONYMOUS: I find if you want to use a Maruarder your gonna want to to upgrade your ammo capacity so you don't do short and not very effective bursts
If you are fast enough you can wait for your burst lasers to charge and then fire.
The Fly Frag Strategy[ | ]
Get a maxed Fly and frag other players. With their gems, save to get rockets or missiles. As no one expects a Fly to have missiles, you have the element of surprise.
This is easy to counter, as even a maxed fly isn't very powerful. A ship with powerful pulses (U-Sniper, Advanced-Fighter, Scorpion, etc.) can kill the fly in 1-2 hits, and even if a direct hit doesn't kill the offending Fly immediately, it will knock it into a spin that is hard to recover from, and likely launch it at high velocity into an asteroid. Ships with high burst damage (Side-fighter, X-Warrior, Shadow X-2, etc.) can also easily defeat the Fly, as they can wear down its shields very fast. Fast, maneuverable ships (A-Speedster, Shadow X-2, etc.) can cause the Fly to waste its missiles by leading them so that asteroids are hit instead. Finally, ships with very high shield capacity, such as the Rock-Tower and O-Defender, can soak up the missiles and shouldn't have any problems unless the Fly is with a team.
Anonymous: Good luck fragging anyone with a fly :P
Anonymus 2: The Electric Boogaloo: only attempt this if you're comparable in skill to nordic commander because otherwise why even bother
Strafe[ | ]
Strafe is a game mechanic added in a update during April 2019. To strafe, press key A to strafe left, and D to strafe right. (reversed when facing down) This way, you can circle around a ship and attack them easily while they have to turn in circles to try to hit you. Strafe is an amazing addition to the dueling aspect of the game! Strafing causes much more skill worthy battles against opponents. Strafe is a way you can dodge enemy fires while freely attacking. Strafe has added more strategies to be used and possibly an addition to team mode! Strafe can be used both offensively and defensively and an amazing strategy all together! Note this is not used anywhere other than being used in that month's ACW event and a short amount of time in the modding space mod of Nautic Series.
The Barracuda and Healer Strategy[ | ]
Barracuda is a very amazing miner but the shield regain slows it down from reaching max potential. But with the addition of healing, everything is changed! Healing can help the Cuda be an absolute mining machine! For this strategy, you need a healer to follow the barracuda and shoot at it as it goes through ramming all the asteroids. This is an excellent strategy to mine up the base and to mine up fellow teammates so they are maxed and at full potential! This strategy does phenomenal in team mode! Credits to PearEatingBear and Backfyred for first trying this out and showing how amazing this is in Competitive!
Gem-Transfer[ | ]
Gem Transfer is a new mechanic added in a recent update! In this update, if you hold "V" you will drop gems from your cargo onto the floor and gem transfer varies by tier. For example a t3 is only allowed to drop 15 gems at a time while a t6 can drop 30 gems at a time. This is a very nice update to team mode as this allows players to join teams late but still get up to speed quickly by their teammates dropping gems for them. This is also a very good strategy when you have a fast miner! You can heal the miner so it can mine quickly and then the miner returns you the favor and gives you gems so you are maxed out then both you and the fast miner can attack together and dominate the teams easily. This strategy allows you to be always ahead of the other teams in quality as you would have many more upgraded ships wait for them to strike.Your only problem is if your team mate is on a mobile and it becomes a one way thing. To stop this you can mine asteroids for them and tell them they can have the gems.
An example of gem transfer:
https://tenor.com/view/starblast-io-give-gems-update-gif-14426769
The Mine Fortress[ | ]
Mines can play a significant role in team mode! To maximize the potential of mines you should use them while attacking an enemy base. In most cases when people attack enemy bases they are easily repelled due to the overwhelming power of the other team but due to this strat, the enemy can't do much. This strategy requires you to get mines preferably heavies and surround them around the area where you would be attacking, this strat completely walls you against Barracuda attacks and other ships that try to kill t7s and other ships by ramming them against bases. This also acts as a shield from normal attacks and counterattacks. In addition to being a great wall, it can also be a good place for a Cuda to ram opponents into so they die. (not to be confused with base nuking)
Base Nuking[ | ]
You can either use heavy mines or torpedoes. For heavy mine base nuking, go to the center base module (take care not to hit the base) and start spamming alt to place your mines, once you place at least 2 stacks you can start firing at the base to get there attention (while spamming alt still). When they try to attack with lasers they will hit the mines and cause them to explode. This strategy can be countered by missiling the attacker and leaving the mines alone or carefully with a healer healing the base kill the mines one by one. This can also be stopped by a heavy enough ship slamming into the attacker while being invincible from the depot or respawining, just note this is very risky due to once the invincibility runs out you will blow up a large amount of mines causing a very large amount of damage to the base.
Torp. nuking is basically the same way as heavy mines but you have to do it from a distance but close enough that it's still reliable and helps. To be effective have a t6 load of torpedoes. There is not much of a counter other than attacking the player as soon as you see there color indicator on the map and hope for the best. Best way to get the credits is to power mine. The heavy mine method is generally seen in Nautic
Pillboxing[ | ]
This is a stratagy derived from a similar space combat game known as Star Control II. In the game's fandom, it's often regarded as a cheap, but semi-effective tactic. It follows the idea of "If you move, you can collide with the planet." While the planets are mere background features in the game (nor are there any gravity wells that pull you to your doom), there's still asteroids and mines to worry about, as both can do substantial damage to your ship if you aren't prepared. The translated strat is stay in one spot and if an enemy comes nearby, you blast them back to their base. Pillboxing with an unupgraded/or not sufficiently upgraded ship is pretty much suicide, and some ships are better than others. Ships with a huge amount of knockback (Advanced Fighter and Scorpion in Vanilla, Beluga in Nautic) are usually the best to go with, along with ships with high shields (O-Defender). Another thing to consider, for both pillboxing and countering pillboxing, is secondaries. Running a ship with full defense pods or attack pods almost triple your chance of coming out on top, if you're the one who is pillboxing. Mines will also help to set up walls between asteroids, usually deterring off opponents who decide to come near you're death trap.
(Note from eX0dus-77: if you do decide to pillbox with a mine-wall strategy, use a fast ship like the Condor or A-speedster and equip pods)
The best ways to counter pillboxers is to use rockets and missiles, as they will be forced to start moving because you caught them off guard. Then you start chasing them down as their fearful retreat gave you the upper hand.
Marauder Swarm[ | ]
As the name says, you swarm your enemy with a group of marauders (3 or more to be most effective). When they all attack at the same time most ships will get stunned from the shear amount of incoming damage. It was first seen in an AOW in Asia in 2020 when a popular youtuber there organised a group of 8 players to attack with marauders and it was quite effective at attacking the enemy teams and only was stopped by a large grouping of heavy hitters like scorpions and advanced fighters and torpedo rains. It's seen rarely in team mode and mostly just with 2 people working together. The swarm becomes even deadlier when the marauders are also loaded up with attack pods and/or missiles. Can work with any fast and agile ship.