m (→General) |
No edit summary Tag: Visual edit |
||
| (16 intermediate revisions by 4 users not shown) | |||
| Line 12: | Line 12: | ||
Main programming language uses in this interface is [https://www.w3schools.com/js/DEFAULT.asp JavaScript (ECMAScript)] |
Main programming language uses in this interface is [https://www.w3schools.com/js/DEFAULT.asp JavaScript (ECMAScript)] |
||
| − | == Documentation and Tutorial == |
+ | == Documentation and Tutorial == |
| + | === Important Notes === |
||
| ⚫ | |||
| + | In newer version of browsers' updates, you can't use the Modding Client in incognito mode anymore as they restrict some incognito features which are used by the editor. |
||
| + | |||
| ⚫ | |||
=== Creating your first mod === |
=== Creating your first mod === |
||
| Line 212: | Line 215: | ||
| map_size || Size of the map, range from 20 to 200 || 100 (survival)<br>80 (team and Battle Royale)<br>60 (unspecified)<br>30 (Invasion)<br>20 (deathmatch) |
| map_size || Size of the map, range from 20 to 200 || 100 (survival)<br>80 (team and Battle Royale)<br>60 (unspecified)<br>30 (Invasion)<br>20 (deathmatch) |
||
|- |
|- |
||
| − | | soundtrack ||"procedurality.mp3", "argon.mp3", "crystals.mp3", "red_mist.mp3, "civilisation.mp3" or "warp_drive.mp3" || |
+ | | soundtrack ||"procedurality.mp3", "argon.mp3", "crystals.mp3", "red_mist.mp3", "civilisation.mp3" or "warp_drive.mp3" or none (empty string) || "crystals.mp3" (invasion and Battle Royale)<br>"argon.mp3" (deathmatch)<br>"procedurality.mp3" (others) |
|- |
|- |
||
| max_players || From 1 to 240 || 70 (team)<br>60 (survival)<br>40 (unspecified)<br>30 (Battle Royale)<br>20 (deathmatch)<br>6 (invasion) |
| max_players || From 1 to 240 || 70 (team)<br>60 (survival)<br>40 (unspecified)<br>30 (Battle Royale)<br>20 (deathmatch)<br>6 (invasion) |
||
|- |
|- |
||
| − | | crystal_value || Float, from 0 to |
+ | | crystal_value || Float, from 0 to 10 || 2 (team)<br>0 (deathmatch and Battle Royale)<br>1 (others) |
|- |
|- |
||
| − | | lives || Number of lives, from |
+ | | lives || Number of lives, from 0 to 5 || 4 (team)<br>1 (deathmatch and Battle Royale)<br> 3 (others) |
|- |
|- |
||
| max_level || Max level you can reach, from 1 to 7 || 7 |
| max_level || Max level you can reach, from 1 to 7 || 7 |
||
|- |
|- |
||
| − | | friendly_colors || Serves to define teams; how many teams (or 0) || 3 (team)<br>1 (invasion)<br>0 (others) |
+ | | friendly_colors || Serves to define teams; how many teams (or 0, maximum 5) || 3 (team)<br>1 (invasion)<br>0 (others) |
|- |
|- |
||
| map_name || Name of the map || Auto-generated name |
| map_name || Name of the map || Auto-generated name |
||
|- |
|- |
||
| − | | survival_level || Level which triggers survival mode (8 for no trigger) || 7 (survival)<br>8 (others) |
+ | | survival_level || Level which triggers survival mode (8 for no trigger, 2 minimum) || 7 (survival)<br>8 (others) |
|- |
|- |
||
| starting_ship || Enter desired ship code: 101, 201, 404, etc. || 101 |
| starting_ship || Enter desired ship code: 101, 201, 404, etc. || 101 |
||
| Line 232: | Line 235: | ||
| starting_ship_maxed || true or false || false |
| starting_ship_maxed || true or false || false |
||
|- |
|- |
||
| − | | asteroids_strength || 0 to |
+ | | asteroids_strength || 0 to 1000000 || 5 (deathmatch)<br>0.5 (Battle Royale)<br>1 (others) |
|- |
|- |
||
| friction_ratio || 0 to 2 || 1 |
| friction_ratio || 0 to 2 || 1 |
||
| + | |- |
||
| + | | strafe || strafing speed factor, an integer from 0 to 1 || 0 |
||
|- |
|- |
||
| speed_mod || 0 to 2 || 1.25 (deathmatch)<br>1.2 (survival and team)<br>1 (others) |
| speed_mod || 0 to 2 || 1.25 (deathmatch)<br>1.2 (survival and team)<br>1 (others) |
||
| Line 242: | Line 247: | ||
| map_id || Number in the range [0-9999] || Game id |
| map_id || Number in the range [0-9999] || Game id |
||
|- |
|- |
||
| − | | map_density || Density of the map || None |
+ | | map_density || Density of the map (0 to 2) || None |
|- |
|- |
||
| − | | weapon_drop || 0 to |
+ | | weapon_drop || 0 to 10 (probability that an asteroid will drop a weapon) || 0 |
|- |
|- |
||
| crystal_drop || percentage of gems can be collected when a ship drain gems || 0.5 (deathmatch)<br>1 (others) |
| crystal_drop || percentage of gems can be collected when a ship drain gems || 0.5 (deathmatch)<br>1 (others) |
||
| Line 252: | Line 257: | ||
| mines_self_destroy || true or false || true |
| mines_self_destroy || true or false || true |
||
|- |
|- |
||
| − | | mines_destroy_delay || all landed mines will be destroyed after this interval if no enemies triggered the mines (in [[Modding Tutorial#Unit|ticks]]) || 3600 (Battle Royale)<br>18000 (others) |
+ | | mines_destroy_delay || all landed mines will be destroyed after this interval if no enemies triggered the mines (in [[Modding Tutorial#Unit|ticks]])<br>minimum 0, no actual maximum limit (highest ever reached is 10<sup>308</sup>) || 3600 (Battle Royale)<br>18000 (others) |
|- |
|- |
||
| healing_enabled || true or false || true (team)<br>false(others) |
| healing_enabled || true or false || true (team)<br>false(others) |
||
|- |
|- |
||
| + | | shield_regen_factor || minimum 0, no actual maximum limit (highest ever reached is 10<sup>308</sup>) || 1 |
||
| − | | healing_ratio || 0 to 2 || 1 |
||
|- |
|- |
||
| + | | power_regen_factor || minimum 0, no actual maximum limit (highest ever reached is 10<sup>308</sup>) || 1 |
||
| − | | shield_regen_factor || 0 to 2 || 1 |
||
|- |
|- |
||
| + | | invulnerable_ships || Ships are invulnerable or not (true/false) || false |
||
| − | | power_regen_factor || 0 to 2 || 1 |
||
|- |
|- |
||
| weapons_store || Set to false to remove access to the weapon store || true |
| weapons_store || Set to false to remove access to the weapon store || true |
||
|- |
|- |
||
| − | | radar_zoom || |
+ | | radar_zoom || minimum 1, no actual maximum limit (highest ever reached is 10<sup>308</sup>) || 2 |
|- |
|- |
||
| auto_refill || When set to true, collecting an energy or shield pill immediately refills energy or shield ; the collected pill is not added to the active weapons || false |
| auto_refill || When set to true, collecting an energy or shield pill immediately refills energy or shield ; the collected pill is not added to the active weapons || false |
||
|- |
|- |
||
| − | | projectile_speed || Affects the speed of rockets, missiles and torpedoes; use 1 for default speed || 1 |
+ | | projectile_speed || Affects the speed of rockets, missiles and torpedoes; use 1 for default speed<br>(minimum 0, no actual maximum limit (highest ever reached is 10<sup>308</sup>) || 1 |
|- |
|- |
||
| choose_ship || e.g. setting to <code>[301,302,303]</code> will let player choose a ship from these 3 ships before entering the game || None |
| choose_ship || e.g. setting to <code>[301,302,303]</code> will let player choose a ship from these 3 ships before entering the game || None |
||
| Line 309: | Line 314: | ||
["U-Sniper","Howler"], |
["U-Sniper","Howler"], |
||
["Crusader","Pioneer"] |
["Crusader","Pioneer"] |
||
| − | ]</pre>The longer the array is, the lower chance for each ship group being available in a single match || See [[Deathmatch]] for a list of default ship groups |
+ | ]</pre>The longer the array is, the lower chance for each ship group being available in a single match || See [[Deathmatch]] for a list of default ship groups<br>'''Note:''' The mod won't run if <code>reset_tree</code> option is set to true |
|} |
|} |
||
| Line 906: | Line 911: | ||
|- |
|- |
||
| bouncing_lasers || if bouncing lasers is enabled or not |
| bouncing_lasers || if bouncing lasers is enabled or not |
||
| + | |- |
||
| + | | max_tier_lives || number of lives when player reaches ships with the highest level (defined in <code>max_level</code> option) |
||
|} |
|} |
||
==== Team mode specific accessible fields ==== |
==== Team mode specific accessible fields ==== |
||
| Line 981: | Line 988: | ||
* [https://www.youtube.com/watch?v=3b2zKArOkXk How to add ship to the mod - by InterdictorSD] |
* [https://www.youtube.com/watch?v=3b2zKArOkXk How to add ship to the mod - by InterdictorSD] |
||
* [https://www.twitch.tv/videos/270359062 Modding Live #2 by PMGL] |
* [https://www.twitch.tv/videos/270359062 Modding Live #2 by PMGL] |
||
| + | * [https://www.youtube.com/watch?v=35SM5rFteIs&t General modding tutorial by Wolfan] |
||
=== Tools === |
=== Tools === |
||
Revision as of 09:38, 9 April 2021
Note: If you're familiar with GitHub theme, you can visit the alternative GitHub Modding Documentation (can be outdated).
Information
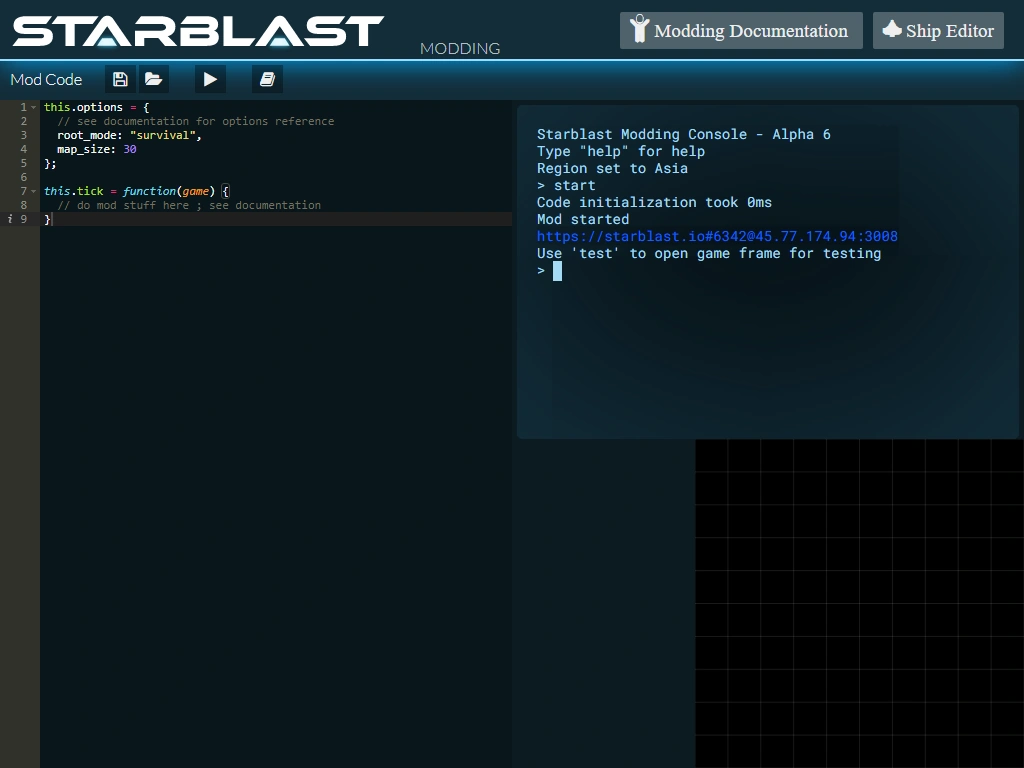
Standard Modding Interface, you can see the minimap of the mod in the bottom right corner while the mod is running
Starblast Modding interface can be found here: https://starblast.io/modding.html (ECP required)
Starblast Modding interface allows you to create custom mods for Starblast. The interface is made of a code editor window, on the left, and a console window, on the right. The code editor is where you type the JavaScript code for your mod. The console is where you can type commands to start your mod, stop it or interact with it while it is running.
Main programming language uses in this interface is JavaScript (ECMAScript)
Documentation and Tutorial
Important Notes
In newer version of browsers' updates, you can't use the Modding Client in incognito mode anymore as they restrict some incognito features which are used by the editor.
And make sure to read all of these from the start to the end so that you won't miss any important info!
Creating your first mod
In the Mod Code window, type the code for your first mod:
this.options = {
  root_mode: "survival",
  map_size: 30
};

this.tick = function(game) {
};
Running and testing a mod
Change region
Once your mod code is ready, in the console, start by selecting your preferred region for modding using the command region <region name>. For example with Europe:
> region Europe
Region set to Europe
> █
(Currently modding is only available in these 3 zones: Europe, America, Asia)
Start mod
Then to start running your mod, type command start:
> start
Mod started
starblast.io#1234@12.34.56.78:2000
Use 'test' to open game frame for testing
> █
Test the mod
As instructed by the console, you may want to open a test window to join your modded game with a Starblast client. Type test:
> test
> █
ALWAYS keep the Mod Editor Tab being active while running the mod!
This is one of the most important things you need to keep in your mind!
Why? Because that's nuances of how browsers work.
Browsers slow down all javascript in non-active tabs in order to decrease the CPU processes.
For some mods (e.g Battle Royale), it doesn't matter like with ship tree and options only,
but for other mods where some logic in tick function or events - it will affect them A LOT!
Ticks start to work slower and slower...
Soon everything will be lagging in game, like any reactions on mod buttons, any mod logic like spawning something in tick, etc.
And... depending on mod complexity it can just CRASH THE ENTIRE MOD - locally, server will continue to work so game will work but without mod logic anymore.
So, always keep the mod editor tab online or you will have unpredictable results!
Also, you need to have a stable internet connection if you don't want your mods becoming laggy.
Stop the currently running mod
You can stop your mod anytime by using command stop. Note that this will kill the game and disconnect all connected players:
> stop
Mod stopped
> █
Other terminal commands
echo
Print any values to the terminal, can be used in both mod code (after mod started) and terminal
Syntax: echo(<item>)
> echo("Message from terminal!")
Message from terminal!
> █
clear
Clear the the terminal, only available in terminal
Syntax: clear
help
Display help message inside the terminal, terminal use only
Syntax: help
Main code parts
Options
Definition
Stored in this.options is a data structure where you can set options for your custom, modded game. These options are used for initializing the game when you start your mod. Changing them while the mod is running does not affect the game.
Custom ships and custom tree
You can import ships made with Starblast Ship Editor. In the Ship Editor, use "Mod Export" feature to export a JavaScript code snippet for the modding interface. Then paste this snipped in the coding window and add this:
var myship_101 = "{ … … <this is your exported ship code> …";

var ships = [myship_101]; // add your ship to an array of ship

this.options = {
  root_mode: "survival",
  ships: ships,         // specifying a list of ships to complement / replace existing ships
  reset_tree: true,     // set to true if you want to remove the original ship tree, false if you just want to replace some of the ships
  map_size: 30
};

this.tick = function(game) {
};
Then run your mod. If your ship is set to level=1 model=1, your ship will replace the Fly. You can replace other ships in the tree in a similar way, using reset_tree: false. Or you can remove the original ship tree completely and provide a whole new one using reset_tree: true.
Customizing the emote-chat system
The vocabulary used for the emote-chat system can be customized by setting the field vocabulary in the game option
as follows:
var vocabulary = [
      { text: "Hello", icon:"\u0045", key:"O" },
      { text: "Bye", icon:"\u0046", key:"B" },
      { text: "Yes", icon:"\u004c", key:"Y" },
      { text: "No", icon:"\u004d", key:"N" },

      { text: "Flower", icon:"\u{1F33B}", key:"F" },
      { text: "Snowman", icon:"\u26c4", key:"M" },
      { text: "Shark", icon:"\u{1F988}", key:"S" },
      { text: "Ghost", icon:"\u{1F47B}", key:"G" }
    ] ;

this.options = {
  vocabulary: vocabulary,
  // ...
};
This allows using Starblast built-in emote icons, which are listed here for reference: https://starblast.io/glyphs.html
You can also use unicode icons, here is a good source for reference: https://unicode.org/emoji/charts/full-emoji-list.html
Note that wide unicode characters (using more than 2 bytes) require a specific Javascript syntax as shown in the example above (example: \u{1F47B})
Custom asteroids maps
You can create a custom map of asteroids. This allows creating a maze for example. The custom map you provide is actually a JavaScript character string which is used to "paint" the map.
For example:
var map =
"999999999999999999999999999999\n"+
"99                          99\n"+
"99                          99\n"+
"99                          99\n"+
"99                          99\n"+
"99                          99\n"+
"99                          99\n"+
"99                          99\n"+
"99                          99\n"+
"99                          99\n"+
"99                          99\n"+
"99                          99\n"+
"99                          99\n"+
"99                          99\n"+
"99                          99\n"+
"99                          99\n"+
"99                          99\n"+
"99                          99\n"+
"99                          99\n"+
"99                          99\n"+
"99                          99\n"+
"99                          99\n"+
"99                          99\n"+
"99                          99\n"+
"99                          99\n"+
"99                          99\n"+
"99                          99\n"+
"99                          99\n"+
"99                          99\n"+
"999999999999999999999999999999" ;


this.options = {
  custom_map: map,
  map_size: 30
}
In the example above, 9 sets the biggest size of asteroid. You can use smaller values for adding smaller asteroids to the grid. Any value other than a digit will be interpreted as no asteroid. If your map_size is set to 30, make sure to create 30 lines and 30 columns, or you may get unpredictable results.
Note: Use "" for blank custom map
You can use Online Map Editor (a community tool) to create, edit and export maps.
Other common options
Most of the options are inherited from the usual custom games. A few more options have been added, specifically for modding (top of the list):
| Option | Description | Default value (if omitted) |
|---|---|---|
| root_mode | The mod to inherit from: "survival", "team", "invasion", "deathmatch", "battleroyale" (or unspecified) | Unspecified |
| reset_tree | Set to true to remove the original ship tree | false |
| ships | An array of ships to add to the tree | None |
| map_size | Size of the map, range from 20 to 200 | 100 (survival) 80 (team and Battle Royale) 60 (unspecified) 30 (Invasion) 20 (deathmatch) |
| soundtrack | "procedurality.mp3", "argon.mp3", "crystals.mp3", "red_mist.mp3", "civilisation.mp3" or "warp_drive.mp3" or none (empty string) | "crystals.mp3" (invasion and Battle Royale) "argon.mp3" (deathmatch) "procedurality.mp3" (others) |
| max_players | From 1 to 240 | 70 (team) 60 (survival) 40 (unspecified) 30 (Battle Royale) 20 (deathmatch) 6 (invasion) |
| crystal_value | Float, from 0 to 10 | 2 (team) 0 (deathmatch and Battle Royale) 1 (others) |
| lives | Number of lives, from 0 to 5 | 4 (team) 1 (deathmatch and Battle Royale) 3 (others) |
| max_level | Max level you can reach, from 1 to 7 | 7 |
| friendly_colors | Serves to define teams; how many teams (or 0, maximum 5) | 3 (team) 1 (invasion) 0 (others) |
| map_name | Name of the map | Auto-generated name |
| survival_level | Level which triggers survival mode (8 for no trigger, 2 minimum) | 7 (survival) 8 (others) |
| starting_ship | Enter desired ship code: 101, 201, 404, etc. | 101 |
| starting_ship_maxed | true or false | false |
| asteroids_strength | 0 to 1000000 | 5 (deathmatch) 0.5 (Battle Royale) 1 (others) |
| friction_ratio | 0 to 2 | 1 |
| strafe | strafing speed factor, an integer from 0 to 1 | 0 |
| speed_mod | 0 to 2 | 1.25 (deathmatch) 1.2 (survival and team) 1 (others) |
| rcs_toggle | true or false | true |
| map_id | Number in the range [0-9999] | Game id |
| map_density | Density of the map (0 to 2) | None |
| weapon_drop | 0 to 10 (probability that an asteroid will drop a weapon) | 0 |
| crystal_drop | percentage of gems can be collected when a ship drain gems | 0.5 (deathmatch) 1 (others) |
| release_crystal | true/false for allowing/forbidding [V] to release gems |
true (team) false (others) |
| mines_self_destroy | true or false | true |
| mines_destroy_delay | all landed mines will be destroyed after this interval if no enemies triggered the mines (in ticks) minimum 0, no actual maximum limit (highest ever reached is 10308) |
3600 (Battle Royale) 18000 (others) |
| healing_enabled | true or false | true (team) false(others) |
| shield_regen_factor | minimum 0, no actual maximum limit (highest ever reached is 10308) | 1 |
| power_regen_factor | minimum 0, no actual maximum limit (highest ever reached is 10308) | 1 |
| invulnerable_ships | Ships are invulnerable or not (true/false) | false |
| weapons_store | Set to false to remove access to the weapon store | true |
| radar_zoom | minimum 1, no actual maximum limit (highest ever reached is 10308) | 2 |
| auto_refill | When set to true, collecting an energy or shield pill immediately refills energy or shield ; the collected pill is not added to the active weapons | false |
| projectile_speed | Affects the speed of rockets, missiles and torpedoes; use 1 for default speed (minimum 0, no actual maximum limit (highest ever reached is 10308) |
1 |
| choose_ship | e.g. setting to [301,302,303] will let player choose a ship from these 3 ships before entering the game |
None |
| collider | enable/disable (true/false) collisions of player ships with anything | true |
Survival mode specific options
| Option | Description | Default value (if omitted) |
|---|---|---|
| survival_time | When to trigger survival mode; 0 or a value in minutes | 60 |
Team mode specific options
| Option | Description | Default value (if omitted) |
|---|---|---|
| hues | array of hue numbers for teams, with the same amount of elements as used for friendly_colors |
Auto-generated hues |
| station_regeneration | factor to apply to station shield regen | 1 |
| station_size | size of the stations; integer from 1 to 5 | 2 |
| station_crystal_capacity | factor to apply to the station crystal capacity, range [0.1,10] | 1 |
| station_repair_threshold | part of the station crystal capacity that must be refilled to repair a module. In the range [0,1] | 0.25 |
| auto_assign_teams | allow assigning players to a specific team (true) or let them choose the team themselves (false) | false |
Deatmatch mode specific options
| Option | Description | Default value (if omitted) |
|---|---|---|
| ship_groups | an array containing some arrays, each of them representing one ship group (by name) available for selection For example: ship_groups: [ ["U-Sniper","Howler"], ["Crusader","Pioneer"] ]The longer the array is, the lower chance for each ship group being available in a single match |
See Deathmatch for a list of default ship groups Note: The mod won't run if reset_tree option is set to true
|
Ticking
Definition
Found in this.tick is a JavaScript function which is called 60 times per second. In this function’s body, you will be able to code specific actions that your mod needs to take automatically while the game is running. This function can be modified while the modded game is running and the changes will apply automagically.
Events
General
Your mod can receive events through the function this.event:
this.event = function(event,game) {
  switch (event.name)
  {
    case "ship_spawned":
      if (event.ship != null)
      {
        shipJustSpawned(event.ship) ;
      }
      break ;
  }
} ;
Available events
| Event name | Description | Additional event fields |
|---|---|---|
| ship_spawned | A ship just spawned in game or respawned | event.ship |
| ship_destroyed | A ship was just destroyed | event.ship, event.killer |
| alien_destroyed | An alien was just killed | event.alien, event.killer |
| asteroid_destroyed | An asteroid was just destroyed | event.asteroid, event.killer |
| collectible_picked | A ship just picked a collectible item | event.collectible, event.ship |
Game step
Definition
Can be accessible through game.step, is an integer presenting game's duration
Unit
The unit of this value is tick, where 1 tick = 1/60 seconds
Which means that 60 ticks = 1 second, 120 ticks = 2 seconds and so on.
Uses
This code uses to set the first ship in the list to the center of the map in the first minute of the mod and reset its crystals every 5 seconds (assume that there is one ship staying from the start of the mod):
this.tick = function (game)
{
  if (game.step == 3600) { // 1 minute = 60 seconds * 60
    game.ships[0].set({x:0,y:0}); // Center teleport
  }
  if (game.step % 300 === 0) { // 5 seconds * 60
    game.ships[0].set({crystals: 0}); // Reset crystals
  }
}
Ships
You can access to the list of ships (players) through the array game.ships
You can also find a ship with specific id using game.findShip(id), which returns an object represent the matched ship or null (if there are no ships matching the provided id)
Accessible fields
You have read access to the ship’s main fields and options:
| Field | Description |
|---|---|
| x | X coordinate |
| y | Y coordinate |
| vx | Velocity vector X component |
| vy | Velocity vector Y component |
| r | Rotation angle of the ship (in radian) |
| name | player's name |
| alive | Whether the ship is alive or destroyed |
| type | Ship type code (e.g. 101) |
| stats | Ship current stats upgrades, compiled into a single integer. For example: 10012301 means the 8 stats upgrade levels are 1,0,0,1,2,3,0 and 1 |
| idle | tells if the ship is in idle status or not |
| team | the id of the team this ship is in |
| score | player's score |
| shield | current shield value |
| generator | current generator value |
| crystals | current crystals value |
| healing | whether the ship's lasers are in healing mode or not |
Configuration
You can set different options on the ships.For example:
> game.ships[0].set({x:0,y:0});
> █
Will move the first ship in the list to the center of the map
List of accepted options when using ship.set:
| Option | Description | Server response error message (if improper) |
|---|---|---|
| x | X coordinate | Wrong coordinate |
| y | Y coordinate | |
| vx | Velocity vector X component | |
| vy | Velocity vector Y component | |
| invulnerable | Use to set the ship invulnerable for X ticks (e.g. 60 for one second invulnerability) | Wrong invulnerable time |
| type | changes the type of ship (use the ship code, e.g. {type:403} ) |
None |
| angle | changes the direction the ship is facing | Wrong angle |
| score | sets player's score | Wrong score |
| idle | set to true to force the ship to stay idle (and false to revert) | None |
| shield | sets the value of the shield | Wrong shield value |
| generator | sets the value of the generator | Wrong generator value |
| healing | sets ship's lasers mode to healing (true or false) | None |
| crystals | sets ship's crystal ammount | Wrong crystals |
| stats | sets the stats upgrades of the ship | None |
| kill | Set kill: (any "truthy" value, e.g: true) to destroy the ship |
No violation |
| team | Changes the team this ship belongs to (in range [0-X] where X is teams - 1) | None |
| hue | Sets the color of the ship (range [0-359])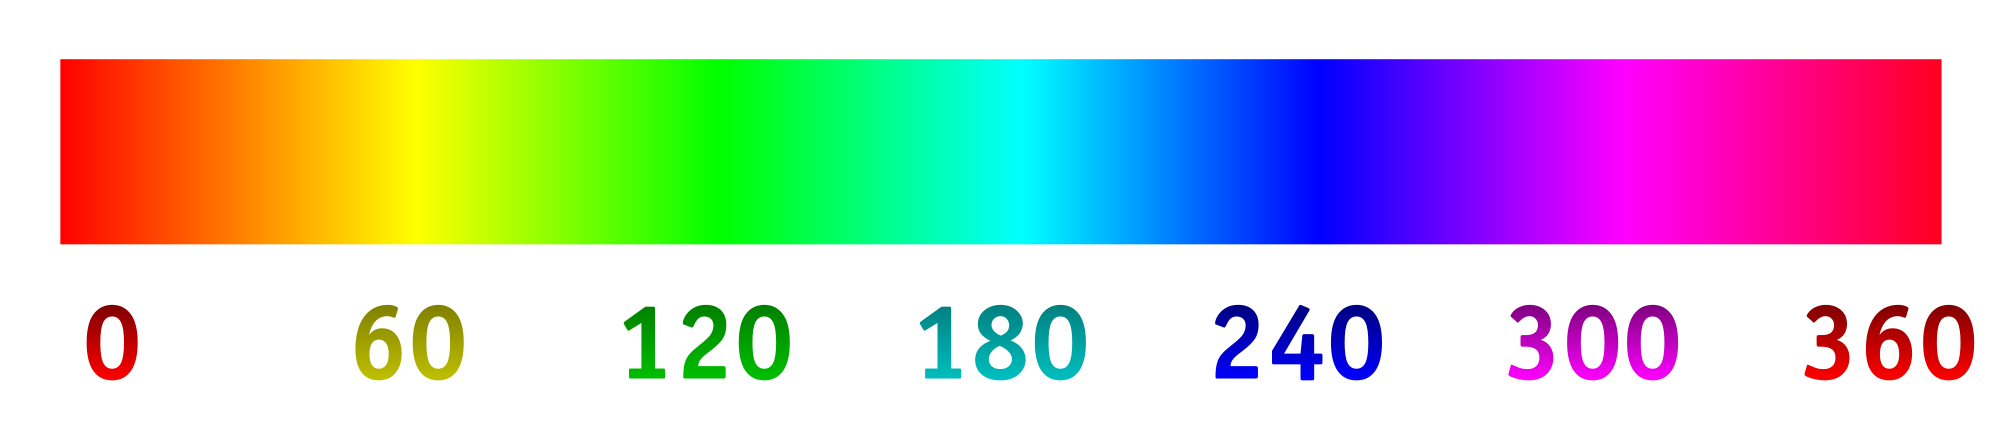 |
None |
Intermission
You can send the ship to intermission (a screen with results, offering to respawn). This screen allows you to display custom results information:
> game.ships[0].intermission({"Best Achievement":"Managed to run the mod","Score":1234});
> █
Triggering and Customizing player's GameOver screen
You can also trigger the gameover screen for any given ship. Here again, you can pass results information to pass on to the player:
> game.ships[0].gameover({"Rating":"Can do better","Score":1234});
> █
Instructor
Calling instructor
You can have the flight instructor send instructions to the player. For this find the players’s ship and use:
> ship.instructorSays("Hello!")
> █
You can hide the instructor window using:
> ship.hideInstructor()
> █
You can later show it again using:
> ship.showInstructor()
> █
A second, optional parameter allows you to choose which one of the instructor characters will talk to the player. Example:
> ship.instructorSays("Here is your report, Commander","Maria")
> █
Available characters
| Lucina | Klaus | Maria | Kan | Zoltar |
|---|---|---|---|---|
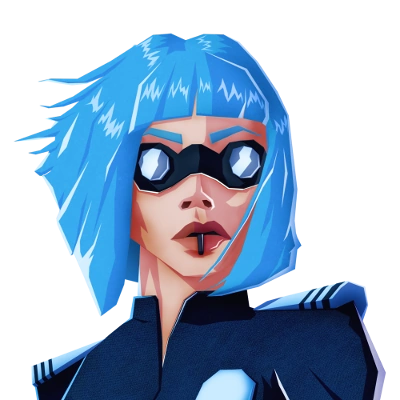 |
 |
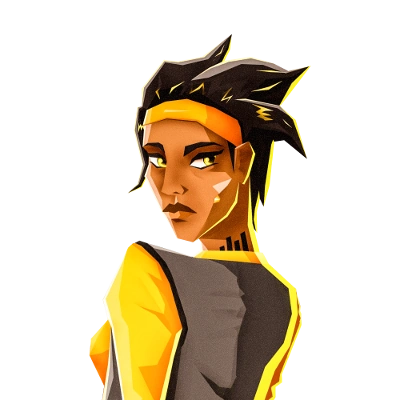 |
 |
|
Custom UI components
General
The mod can create custom UI components that will show up on the player’s screen. This is done by calling setUIComponent on the ship, passing in a component descriptor.
For example:
> ship.setUIComponent({
    id:"myid",
    position:[0,0,25,25],
    clickable: true,
    shortcut: "X",
    visible: true,
    components: [
      { type:"box",position:[0,0,100,100],fill:"#456",stroke:"#CDE",width:2},
      { type: "text",position: [0,0,100,50],color: "#FFF",value: "My Text"},
      { type: "player",id: 1, position: [0,0,50,50],color: "#FFF"},
    ]
  })
> █
Here is the list of UIComponent's accepted options:
| Option | Description | Default value (if omitted) |
|---|---|---|
| id | a unique identifier for this component, mandatory | None |
| position | expressed in percentage of the main screen, the position of the component [x,y,width,height]. Example: [45,45,10,10] creates a component in the center of the screen, which width and height are 10% of the screen width and height. | None |
| visible | Whether the component is visible or not. Resend the same data with visible set to false to hide the component | true |
| clickable | Whether this component can be clicked or not | false |
| shortcut | When the component is clickable, a keyboard shortcut allowing to trigger the click event | None |
| components | gives a list (array) of graphical features to render within the component, which will be described below | Empty array |
Subcomponents' accepted options
| Option | Description | Default value (if omitted) |
|---|---|---|
| type | type of the subcomponents currently supported: "round", "text", "box" or "player" |
None |
| id ("player" type only) | id of the player associated with the subcomponent, which will be disapleyd as their name and badge (if exists) in the rendered subcomponent | None |
| position | positions of the subcomponents, formatted as [x,y,width,height]these subcomponents are meant within the main component coordinates |
None |
| value | value of the subcomponent, e.g value:"Sample text" |
Empty string |
| color | text color of the subcomponent, this can be a string with any color formats (hex, hsla, rgb, etc.), e.g "#fff" |
None |
| fill | background color of the subcomponent, same format as the color property |
None |
| width | width of the subcomponent's border (in percent) | 0 |
| stroke | border color of the subcomponent, same format as the color property |
None |
| align | alignment of the texts inside the subcomponent "left", "right" or "center" only |
"center"
|
Combining with events
The example below creates a warp button for every player, which can be clicked and results in the ship warping to another random location, also adding 3 seconds invulnerability to it:
Full example: https://github.com/pmgl/starblast-modding/blob/master/examples/warp_button.js
var warp_button = {
  id: "warp",
  position: [2,50,8,14],
  clickable: true,
  shortcut: "W",
  visible: true,
  components: [
    { type:"round",position:[0,0,100,100],fill:"#456",stroke:"#CDE",width:2},
    { type: "text",position:[10,35,80,30],value:"WARP",color:"#CDE"},
    { type: "text",position:[20,70,60,20],value:"[W]",color:"#CDE"}
    ]
};

var warpShip = function(ship) {
  x = (Math.random()-.5) * ship.game.options.map_size*10 ;
  y = (Math.random()-.5) * ship.game.options.map_size*10 ;
  ship.set({x:x,y:y,vx:0,vy:0,invulnerable:180}) ;
} ;

this.tick = function(game) {
  if (game.step%60==0) // ensure this is done only once per second
  {
    for (var i=0;i<game.ships.length;i++)
    {
      var ship = game.ships[i] ;
      if (!ship.custom.warp_button_installed)
      {
        ship.custom.warp_button_installed = true;
        ship.setUIComponent(warp_button);
      }
    }
  }
} ;

this.event = function(event,game) {
  switch (event.name)
  {
    case "ui_component_clicked":
      var ship = event.ship ;
      var component = event.id ;
      if (component == "warp") // check that this is our component "warp"
      {
        warpShip(ship);
      }
      break ;
  }
} ;
Customizing the scoreboard or radar
The built-in scoreboard can be replaced by your own custom scoreboard component. As soon as an UI component with id "scoreboard" or "radar_background" is created, you will be responsible for updating the scoreboard/radar. Your custom scoreboard/radar component does not have to include a position because it will automatically fill the area already reserved for the perspective UI Component.
Global UI
You can use game.setUIComponent({ options }) to set the UI to all current players in the game
Other methods and instances
Remove all ship's secondary slots
Syntax: ship.emptyWeapons()
Aliens
You can access to the list of aliens through the array game.aliens
You can also find an alien with specific id using game.findAlien(id), which returns an object represent the matched alien or null (if there are no aliens matching the provided id)
Creation
To create an alien, use game.addAlien({ options })
List of accepted options:
(Note: Server will response with Incorrect data when at least one input property value is improper)
| Option | Description | Default value (if omitted) |
|---|---|---|
| x | X coordinate | 0 |
| y | Y coordinate | |
| vx | Velocity vector X component | |
| vy | Velocity vector Y component | |
| code | Type of alien, must be an integer in range [10-20] | 10 |
| level | Level of the alien, in range [0-X] where X depends of the alien type | 0 |
| points | The number of points you earn when you kill this alien | None |
| crystal_drop | The crystal amount to be dropped when this alien is killed | |
| weapon_drop | The code of a collectible weapon to be dropped by this alien when killed |
Here is the list of supported codes:
| Code | Alien name |
|---|---|
| 10 | Chicken |
| 11 | Crab |
| 12 | Fortress |
| 13 | Some weird new thingy |
| 14 | Candlestick |
| 15 | Hirsute |
| 16 | Piranha |
| 17 | Pointu |
| 18 | Fork |
| 19 | Saucer |
| 20 | Final Boss |
A new Alien object is immediately added to game.aliens; however it cannot be used before it has been assigned an id (positive integer) by the server.
Configuration
Once an alien is live and has an assigned id, you can set options to it. For example:
> game.aliens[0].set({x:0,y:0});
> █
Will move the first alien in the list to the center of the map
Accepted options when using alien.set:
| Option | Description | Server response error message (if improper) |
|---|---|---|
| x | X coordinate | Wrong coordinate |
| y | Y coordinate | |
| vx | Velocity vector X component | |
| vy | Velocity vector Y component | |
| shield | Shield | Wrong shield value |
| regen | Shield regen | Wrong regen value |
| damage | Laser damage | Wrong damage value |
| laser_speed | Laser speed | |
| rate | Firing rate | Wrong rate value |
| kill | Set kill: (any "truthy" value, e.g: true) to destroy the alien |
No violation |
Collectibles
You can spawn collectible weapons in the playfield
You can also find a collectible with specific id using game.findCollectible(id), which returns an object represent the matched collectible or null (if there are no collectibles matching the provided id)
Creation
Here is an example:
> game.addCollectible({code:10,x:0,y:0});
> █
This will add a new collectible pack of rockets to coordinates (0;0)
Here is the list of supported codes:
(Note: Server will response with Incorrect data when at least one input property value is improper)
| Code | Description |
|---|---|
| 10 | 4 rockets pack |
| 11 | 2 missiles pack |
| 12 | 1 torpedo |
| 20 | 8 light mines pack |
| 21 | 4 heavy mines pack |
| 40 | Mining pod |
| 41 | Attack pod |
| 42 | Defense pod |
| 90 | Energy refill |
| 91 | Shield refill |
Accessing
You can check the collectibles still available to collect in the playfield by using: game.collectibles
Asteroids
You can access to the list of moving asteroids through the array game.asteroids
You can also find an asteroid with specific id using game.findAsteroid(id), which returns an object represent the matched asteroid or null (if there are no asteroids matching the provided id)
Creation
To create an asteroid, use game.addAsteroid({ options }).
Here is the list of accepted options:
(Note: Server will response with Incorrect data when at least one input property value is improper)
| Option | Description | Default value (if omitted) |
|---|---|---|
| x | X coordinate | 0 |
| y | Y coordinate | |
| vx | Velocity vector X component | |
| vy | Velocity vector Y component | |
| size | Size of the asteroid in the range [1-100] | 30 |
A new Asteroid object is immediately added to game.asteroids ; however it cannot be used before it has been assigned an id (positive integer) by the server.
Configuration
Once an asteroid is live and has an assigned id, you can set options to it. For example:
> game.asteroids[0].set({x:0,y:0});
> █
Will move the first asteroid in the list to the center of the map
List of accepted options when using asteroid.set:
| Option | Description | Server response error message (if improper) |
|---|---|---|
| x | X coordinate | Wrong coordinate |
| y | Y coordinate | |
| vx | Velocity vector X component | |
| vy | Velocity vector Y component | |
| size | Asteroid size in the range [1-100] (note that changing asteroid size resets its life points) |
Incorrect size |
| kill | Set kill: (any "truthy" value, e.g: true) to destroy the asteroid |
No violation |
Add 3D objects to the scenery
The mod can create custom, textured 3D objects and add them to the scenery using game.setObject method. These objects have
no physics for now (physics is planned in a near future).
For example:
var cube = {
  id: "cube",
  obj: "https://raw.githubusercontent.com/pmgl/starblast-modding/master/objects/cube/cube.obj",
  diffuse: "https://raw.githubusercontent.com/pmgl/starblast-modding/master/objects/cube/diffuse.jpg"
} ;

game.setObject({
  id: "cube",
  type: cube,
  position: {x:0,y:0,z:0},
  rotation: {x:0,y:0,z:0},
  scale: {x:1,y:1,z:1}
}) ;
Object type options
| Option | Description |
|---|---|
| id | a unique identifier for this object type, mandatory |
| obj | a URL (HTTPS) to the OBJ file |
| type | Object instance options, see the section below for more details |
| diffuse | a URL (HTTPS) to a diffuse texture file (optional) |
| emissive | a URL (HTTPS) to an emissive texture file (optional) |
| specular | a URL (HTTPS) to a specularity texture file (optional) |
| bump | a URL (HTTPS) to a bump texture map (optional) |
| diffuseColor | diffuse color of the object, e.g. 0xFF0000 (for red) |
| emissiveColor | emissive color of the object, e.g. 0x00FFFF (for cyan) |
| specularColor | specular color of the object |
| transparent | whether the object's texture has transparency or not |
| bumpScale | scale for bump mapping (default: 0.1) |
Object instance options
| Option | Description |
|---|---|
| id | a unique identifier for this object instance (mandatory, allows changing the object afterwards) |
| type | the object type definition |
| position | coordinates for placing the object |
| scale | allows to scale the object |
| rotation | allows to rotate the object |
| shape | Object's shape (used for creating hitbox) Note: We recommend not to use this property as it usually doesn't work as expected |
Accessing
Game property game.objects stores all active 3D Objects maintained by the mod
You shouldn't modify this property in order to keep the mod run smoothly
Changing or moving an object
Use game.setObject again with the same object instance id.
Removing an object
game.removeObject(id) removes the object with given id. You can omit the id parameter, which will remove all custom objects in the scene.
Example
Working example, adding cube objects to the scenery: https://github.com/pmgl/starblast-modding/blob/master/examples/adding_cube.js
Reading game's detailed options
Accessing
Once the mod starts running, all detailed options will be passed into the game.options object
Accessible fields
This includes all properties defined in this.options, plus some extended fields listed below (except if they are not defined):
| Field | Description |
|---|---|
| bouncing_lasers | if bouncing lasers is enabled or not |
| max_tier_lives | number of lives when player reaches ships with the highest level (defined in max_level option)
|
Team mode specific accessible fields
| Field | Description |
|---|---|
| teams | an array represent teams' most basic info each item in the array contains:
|
| crystal_capacity | an array presenting the capacity of the stations in the increasing level order |
| deposit_shield spawning_shield structure_shield |
an array presenting the the stations' deposits/spawnings/small structures shield in the increasing level order |
| deposit_regen spawning_regen structure_regen |
an array presenting the the stations' deposits/spawnings/small structures regeneration in the increasing level order |
Assigning custom properties to some entities/objects
You can assign properties into some game entities or objects as side notes/indicators
Accessing and assigning
Simply just call out their custom property (which is always an object) and assign properties to it.
Supported objects/entities
gameobject- all ships
- all aliens
- all collectibles
- all asteroids
Example
game.custom.hasMod = true // game object
game.ships[0].custom.userScore = 6712 // ship entity
game.aliens[0].custom = {created: true, rating: "10stars"} // alien entity
game.asteroids[0].custom = {init: true} // asteroid entity
Other game instances and methods
Set custom maps in-game
You can use game.setCustomMap(<map pattern>) to set custom map while the game is running
where <map pattern> has the same format as the custom map in this.options
Lock/unlock the mod from attracting new players
Use game.setOpen(true/false) to lock/unlock the mod to be visible to players (only for Modding Space mods)
There is also game boolean properties game.is_open is used to determine if the mod is open or not
Common problems and how to fix them
Black screen issue
In most cases you're getting a black screen after loading your mod cause of bad ship tree.
Follow these rules to avoid it:
- Your ship tree must have a ship with type/code 101.
- If your ship tree has level 2 ships, then it should have level 1 ships too.
- Either models should go in the right order without gaps: 1, 2, 3 etc (not 1, 6, 17) or control all ship tree routes by next param in ship codes (but keep correct order for unreachable ships).
- You can't have possibly infinite ship tree routes, made by next params - all routes should end at some ship, there shouldn't be able to come back to some ship again.
My mod closed accidentally but the game is not stopped
Sometimes, some unexpected problem can crash the mod, but it only disconnects from the modding side, or so-called "controller" side, the game itself will continue running without control from your modding client until it meets the closing requirements (or even in some serious occasions, game developers - like PMGL - need to close it by themeselves).
Here is some reasons which can lead to mod crashing:
- Closing/Reloading the modding tab/window without stopping the mod first (Most common one)
- Very unstable internet connection
- Server resolve error (which will automatically disconnect the controller by itself)
- Browser tab hangs/crashed (careful of infinite while/for loops)
Also keep in mind that you can't reconnect to your previously crashed server, even if it's still running.
Community resources
Tutorial and Documentation
- How to add ship to the mod - by InterdictorSD
- Modding Live #2 by PMGL
- General modding tutorial by Wolfan